In the realm of home entertainment and professional presentations, projectors have become indispensable tools, offering large-screen viewing experiences that surpass traditional televisions. Choosing the right projection setup is paramount, and for many, ceiling mounting presents an optimal solution, providing space efficiency and a clean, aesthetically pleasing installation. Navigating the complexities of projector specifications, features, and technologies can be daunting, however. This article addresses the increasing demand for high-quality, permanently installed projection solutions by offering a curated selection and comprehensive analysis.
This “Best Ceiling Mounted Projectors – Reviews & Buying Guide” provides in-depth reviews of top-rated models currently available, considering key factors such as image quality, brightness, resolution, connectivity, and user-friendliness. Designed to assist consumers in making informed decisions, this guide also includes a detailed buying guide, outlining critical considerations for selecting the best ceiling mounted projectors that align with specific needs and budget constraints.
We’ll be reviewing the best ceiling mounted projectors shortly, but first, here are a few related products on Amazon:
![[Built-in Apps/4K Support] Smart Outdoor Projector with WiFi and Bluetooth, Movie Projector, DoIby Audio with Dual Speaker, Auto Focus w/ YouTube&PrimeVideo Proyector, Upgrad P62 Pro](https://m.media-amazon.com/images/I/51yAGv8VI7L._SL160_.jpg)

Analytical Overview of Ceiling Mounted Projectors
Ceiling mounted projectors have witnessed significant growth in recent years, driven by the increasing demand for immersive home theater experiences and versatile presentation solutions in professional settings. Market research indicates a consistent year-over-year increase in projector sales, with a notable percentage attributed to ceiling-mounted models due to their space-saving design and ability to deliver larger screen sizes. This trend is fueled by advancements in projection technology, including improved brightness, resolution (4K and beyond), and color accuracy, making them a compelling alternative to traditional televisions.
One of the primary benefits of ceiling-mounted projectors lies in their ability to eliminate obstructions and deliver a clean, professional aesthetic. Unlike floor-standing or table-top projectors, they are less susceptible to accidental bumps or shadows, resulting in an unobstructed viewing experience. They also offer greater flexibility in screen placement and size, often exceeding the limitations of typical TV sizes. The market offers a wide range of options, catering to diverse needs and budgets, from entry-level models for casual home use to high-end projectors designed for dedicated home theaters or large conference rooms. For example, some models boast up to 5,000 lumens of brightness, allowing for comfortable viewing even in moderately lit environments.
However, ceiling-mounted projectors also present certain challenges. Installation can be more complex than with other projector types, often requiring professional assistance to ensure proper mounting and alignment. Furthermore, the cost of installation, including mounting hardware and potential electrical work, can add to the overall expense. Consumers looking for the best ceiling mounted projectors should also factor in the cost of the projector screen, as the image quality is heavily dependent on the screen’s surface and gain.
Despite these challenges, the benefits of ceiling-mounted projectors often outweigh the drawbacks for users seeking a truly immersive and versatile viewing experience. Ongoing innovation in wireless connectivity, keystone correction, and smart features further enhance their appeal, making them an increasingly popular choice for both residential and commercial applications. As technology continues to advance and prices become more competitive, ceiling-mounted projectors are poised to remain a significant player in the display market.
5 Best Ceiling Mounted Projectors
Epson Home Cinema 5050UB
The Epson Home Cinema 5050UB establishes itself as a leading projector due to its exceptional black levels, crucial for impactful viewing experiences. Leveraging a 3LCD projection system and a dynamic contrast ratio of 1,000,000:1, the 5050UB renders deep blacks, contributing to enhanced image depth and overall picture quality. Its motorized lens facilitates effortless setup and precise adjustments for focus, zoom, and lens shift, accommodating diverse screen sizes and room configurations. A significant advantage lies in its support for 4K HDR content, upscaling non-4K material effectively while showcasing native 4K content with remarkable clarity and detail. Measured color accuracy aligns closely with industry standards, minimizing the need for extensive calibration.
Quantifiable benefits include a tested brightness exceeding 2,600 lumens, suitable for moderate ambient light environments. Input lag, measured at approximately 27ms, positions it adequately for casual gaming, though dedicated gamers might seek lower latency. While lamp life is rated at up to 5,000 hours in ECO mode, replacement lamp costs should be factored into long-term ownership expenses. The projector’s noise level, though present, remains within acceptable limits for most viewing scenarios. Its overall performance justifies its premium price point, particularly for users prioritizing cinematic image quality and flexible installation options.
Sony VPL-VW325ES
The Sony VPL-VW325ES stands out as a native 4K projector, delivering exceptional detail and clarity. Utilizing SXRD panels, this projector boasts a high dynamic contrast ratio and impressive color accuracy. The Reality Creation engine upscales non-4K content effectively, enhancing sharpness and resolution. Its relatively compact design simplifies installation compared to some competitors, and the quiet operation ensures minimal distraction during viewing. Furthermore, the VPL-VW325ES supports HDR10 and HLG, enabling a wider color gamut and improved dynamic range for compatible content.
Objective assessments reveal a measured brightness of approximately 1,500 lumens, making it best suited for dedicated home theater environments with controlled lighting. Input lag is approximately 27ms, adequate for casual gaming but potentially insufficient for competitive gaming applications. Lamp life is rated at up to 6,000 hours in low mode, providing a reasonable lifespan before replacement. The projector’s color reproduction consistently earns high marks, with pre-calibration settings offering accurate and vibrant images. While not the brightest option, its exceptional detail and color accuracy solidify its position as a strong contender in the premium 4K projector market.
JVC DLA-NX5
The JVC DLA-NX5 distinguishes itself with exceptional native contrast, a defining characteristic for achieving true black levels and a captivating visual experience. Employing JVC’s D-ILA technology, the projector delivers inky blacks that enhance image depth and detail. Its 4K e-shift technology effectively simulates a 4K resolution, providing a visually compelling alternative to native 4K at a more accessible price point. The projector also benefits from JVC’s Auto Tone Mapping, which optimizes HDR performance automatically for each source. This reduces the need for manual adjustments and ensures consistent HDR viewing.
Independent testing confirms a native contrast ratio exceeding 40,000:1, a significant advantage compared to projectors relying solely on dynamic iris systems. Brightness levels, measured around 1,800 lumens, are suitable for darkened home theaters. Input lag, while not ideal for competitive gaming, is acceptable for general use. Lamp life is estimated at up to 4,500 hours in low mode. The DLA-NX5’s strength lies in its ability to produce a film-like image with impressive depth and detail, making it a compelling choice for cinephiles prioritizing image quality.
BenQ HT3550
The BenQ HT3550 represents a compelling value proposition, offering 4K HDR performance at a more accessible price point. Using a DLP chip, the projector provides sharp and detailed images, while the integrated DCI-P3 color coverage aims to deliver accurate and vibrant colors. The HT3550 also includes features such as vertical lens shift and keystone correction, aiding in flexible installation options. Its relatively compact design further simplifies setup in various room configurations.
Data shows the BenQ HT3550 achieves a brightness level of around 2,000 lumens, suitable for rooms with moderate ambient light control. Input lag is measured at approximately 49ms, making it less ideal for fast-paced gaming. Lamp life is rated at up to 10,000 hours in lamp-saving mode, translating to a lower long-term cost of ownership. While not offering the deepest black levels of more expensive models, its overall performance and feature set make it a strong contender for budget-conscious consumers seeking a 4K HDR projector.
Optoma UHD60
The Optoma UHD60 provides a cost-effective entry point into the 4K projector market. Utilizing a DLP chipset with pixel-shifting technology, the UHD60 simulates 4K resolution, delivering enhanced detail compared to 1080p projectors. Its high brightness output makes it suitable for environments with moderate ambient light. The inclusion of vertical lens shift adds flexibility in placement and installation.
Quantifiable data reveals a measured brightness exceeding 3,000 lumens, allowing for viewing in rooms with ambient light. Input lag is approximately 33ms, making it suitable for casual gaming but less ideal for competitive scenarios. Lamp life is estimated at up to 15,000 hours in Dynamic Black mode, minimizing long-term maintenance costs. While not offering the superior black levels or color accuracy of higher-end models, the Optoma UHD60 remains a viable option for users prioritizing brightness and affordability in a 4K projector.
Why Choose Ceiling Mounted Projectors?
Ceiling-mounted projectors offer a distinct advantage in creating a dedicated and immersive viewing environment, a primary factor driving their purchase. Unlike portable projectors, which often require setup and adjustments before each use, ceiling-mounted units provide a permanent, precisely aligned display solution. This consistency is particularly valuable for home theaters, conference rooms, or classrooms where a reliable, hassle-free visual presentation is paramount. The fixed position eliminates the need for constant recalibration, ensuring optimal image quality and consistent projection angles, contributing significantly to a professional and polished viewing experience.
From a practical standpoint, ceiling mounting optimizes space utilization. By positioning the projector overhead, it frees up valuable floor or table space, which is especially beneficial in smaller rooms or environments where clutter is a concern. This configuration also minimizes the risk of obstruction. Passing individuals or objects won’t cast shadows on the screen, and there’s less chance of accidental bumps or damage to the projector itself. This inherent stability and space-saving characteristic make ceiling-mounted projectors an appealing option for environments where space is at a premium or where a clean, uncluttered aesthetic is desired.
Economically, while the initial investment in a ceiling-mounted projector and its installation might be higher compared to a portable option, the long-term benefits can outweigh the upfront costs. Ceiling-mounted projectors often boast superior image quality, brightness, and lamp life compared to their portable counterparts, translating to fewer replacements and lower maintenance costs over time. Furthermore, the fixed and secure mounting reduces the likelihood of accidental damage, minimizing the need for costly repairs or replacements. In the long run, the durability and enhanced performance contribute to a lower total cost of ownership, especially for frequent users.
The shift towards home theaters and immersive entertainment experiences also fuels the demand for ceiling-mounted projectors. Consumers are increasingly seeking to replicate the cinematic experience within their homes, and a ceiling-mounted projector with a large screen offers a compelling alternative to traditional televisions. The ability to project a large, high-resolution image onto a dedicated screen significantly enhances the viewing experience, creating a more engaging and visually captivating environment. This growing demand for immersive entertainment, coupled with the practical and economic advantages, solidifies the need for ceiling-mounted projectors.
Projector Screen Considerations for Optimal Viewing
The selection of a projector screen is just as crucial as the projector itself when aiming for the best cinematic experience. A high-quality projector can be severely limited by an inadequate screen, resulting in washed-out colors, poor contrast, and a less immersive viewing experience. Factors such as screen size, material, gain, and whether it’s fixed or retractable all play significant roles in picture quality. Matching the screen to your projector’s capabilities and your room’s ambient lighting conditions is paramount for achieving the intended visual impact.
Screen size should be carefully considered based on viewing distance and room dimensions. Too small, and viewers may strain to see details; too large, and the image becomes overwhelming and potentially blurry. The general rule of thumb is that the screen width should be approximately half the viewing distance. However, personal preference and content type (e.g., movies vs. video games) can also influence this decision.
The screen’s material directly affects image brightness, contrast, and color accuracy. Matte white screens are versatile and work well in most environments, providing a wide viewing angle and neutral color reproduction. However, they may struggle in rooms with high ambient light. Gray screens offer improved contrast in moderately lit rooms but may require a brighter projector. ALR (Ambient Light Rejecting) screens are designed to minimize the impact of ambient light, making them suitable for well-lit environments.
Screen gain refers to the screen’s ability to reflect light. A higher gain screen will reflect more light towards the viewer, resulting in a brighter image. However, high-gain screens can also have a narrower viewing angle and may introduce hot spotting (uneven brightness across the screen). Choosing the right gain requires balancing brightness with viewing angle and the projector’s light output.
Fixed frame screens provide a permanently mounted, taut surface for optimal image quality. Retractable screens, on the other hand, offer flexibility and can be hidden when not in use. However, retractable screens may be more prone to wrinkles or waves, which can negatively affect image quality. Ultimately, the best screen type depends on the viewer’s aesthetic preferences, space constraints, and desired level of performance.
Understanding Throw Distance and Lens Shift Capabilities
Throw distance, the distance between the projector lens and the screen, is a critical factor to consider when choosing a ceiling-mounted projector. Different projectors have different throw ratios, which dictate the screen size achievable at a specific distance. Understanding your room’s dimensions and the projector’s throw ratio is essential to ensure that the image fills the screen properly without distortion. Mismatched throw distance can lead to images that are either too large or too small for the screen.
Short-throw projectors are designed for smaller spaces, allowing for large images to be projected from a short distance. These projectors minimize shadows cast by viewers walking in front of the projector and are ideal for rooms where mounting space is limited. Standard-throw projectors offer more flexibility in terms of placement but require a longer distance to project a similarly sized image. Long-throw projectors are typically used in larger venues like auditoriums or theaters.
Lens shift is a valuable feature that allows for adjustments to the image position without physically moving the projector. This is particularly useful in ceiling-mounted setups where precise alignment can be challenging. Horizontal lens shift allows for side-to-side adjustments, while vertical lens shift allows for up-and-down adjustments. The amount of lens shift varies between models, with some projectors offering minimal adjustments and others providing significant flexibility.
The availability of lens shift can greatly simplify the installation process and provide more flexibility in projector placement. It allows for correcting minor misalignments and avoiding keystone correction, which can degrade image quality. Keystone correction digitally alters the image to compensate for angled projection, but it can introduce artifacts and reduce image sharpness. Therefore, opting for a projector with lens shift is generally preferable to relying solely on keystone correction.
When planning your ceiling-mounted projector setup, carefully calculate the required throw distance based on your screen size and room dimensions. Consider whether a short-throw, standard-throw, or long-throw projector is best suited for your space. If possible, choose a projector with lens shift capabilities to provide greater flexibility in placement and minimize the need for keystone correction.
Calibrating Your Projector for Optimal Picture Quality
Projector calibration is a crucial step to maximize the visual experience, ensuring accurate colors, optimal brightness, and balanced contrast. Out-of-the-box settings often prioritize brightness over color accuracy, leading to unnatural or washed-out images. Calibrating your projector involves adjusting various settings, such as color temperature, gamma, and individual color channels, to achieve a more accurate and pleasing picture. A properly calibrated projector will bring out the full potential of your content, whether you’re watching movies, playing video games, or giving presentations.
There are two main approaches to projector calibration: using built-in settings and using professional calibration tools. Most projectors offer basic picture settings, such as brightness, contrast, saturation, and sharpness. While these settings can be adjusted manually, they often provide limited control over the finer aspects of image quality. More advanced projectors may offer additional settings, such as color temperature presets, gamma correction, and individual color channel adjustments (red, green, blue).
Professional calibration tools, such as colorimeters and spectrophotometers, provide a more accurate and scientific approach to calibration. These devices measure the light output of the projector and compare it to industry standards, providing detailed feedback on color accuracy, brightness levels, and contrast ratios. Using this data, calibration software can generate custom color profiles that optimize the projector’s performance for your specific screen and viewing environment.
While professional calibration can yield the best results, it can also be costly. A more affordable option is to use online calibration guides and test patterns to manually adjust your projector’s settings. These guides provide step-by-step instructions and visual references to help you achieve a more accurate picture without the need for specialized equipment. However, manual calibration requires patience and a keen eye for detail.
Regardless of the method you choose, projector calibration is a worthwhile investment in your viewing experience. Taking the time to properly calibrate your projector will result in more vibrant colors, deeper blacks, and a more immersive picture overall. It’s recommended to recalibrate your projector periodically, as lamp aging and environmental factors can affect its performance over time.
Maintaining and Troubleshooting Your Ceiling Mounted Projector
Regular maintenance is essential to prolong the lifespan and optimize the performance of your ceiling-mounted projector. Dust accumulation is a common problem, as ceiling-mounted projectors are often exposed to dust particles in the air. Dust can clog the air vents, leading to overheating and reduced lamp life. It can also settle on the lens, affecting image sharpness and brightness. Cleaning the projector regularly will help prevent these issues and ensure optimal performance.
The most important maintenance task is cleaning the air filters. Air filters trap dust and debris, preventing them from entering the projector’s internal components. The frequency of cleaning depends on the environment, but generally, it’s recommended to clean the air filters every few months. Refer to your projector’s manual for specific instructions on how to access and clean the air filters. Typically, you can use a vacuum cleaner or compressed air to remove dust from the filters.
Lens cleaning is another crucial maintenance task. Over time, dust and fingerprints can accumulate on the lens, affecting image quality. Use a soft, lint-free cloth specifically designed for cleaning lenses. Gently wipe the lens in a circular motion, avoiding excessive pressure. Never use harsh chemicals or abrasive cleaners, as they can damage the lens coating.
Troubleshooting common projector problems can save you time and money. If your projector is not turning on, check the power cord and the power outlet. Ensure that the power switch is in the “on” position. If the projector turns on but there is no image, check the input source and the connections to your source devices (e.g., Blu-ray player, computer). Make sure the correct input source is selected on the projector.
If the image is blurry or distorted, check the focus and keystone settings. Adjust the focus ring until the image is sharp. If the image is trapezoidal, use the keystone correction feature to square it. However, avoid excessive keystone correction, as it can degrade image quality. If you experience color distortion, try adjusting the color settings in the projector’s menu. If the problem persists, you may need to calibrate the projector. For more complex issues, such as lamp failure or internal component malfunctions, it’s best to consult a professional repair service.
Best Ceiling Mounted Projectors: A Comprehensive Buying Guide
Ceiling mounted projectors offer a streamlined and immersive viewing experience, freeing up floor space and creating a dedicated home theater or professional presentation environment. Choosing the right projector for ceiling installation requires careful consideration of several factors, as it’s a more permanent setup than a tabletop projector. This guide provides a detailed analysis of the key features and specifications to evaluate when selecting the best ceiling mounted projectors for your specific needs. Understanding these elements ensures optimal image quality, ease of installation, and long-term satisfaction.
Brightness (Lumens) and Ambient Light Control
Brightness, measured in lumens, dictates a projector’s ability to produce a clear and vibrant image in various lighting conditions. Higher lumen counts are crucial for rooms with ambient light, as the projected image needs to overpower external light sources to maintain visibility and color accuracy. For a dedicated home theater with minimal light, 1500-2000 lumens might suffice. However, for a living room or conference room with uncontrolled light, 3000 lumens or more are recommended. Projectors with insufficient brightness will produce a washed-out, faded image, diminishing the viewing experience and making details difficult to discern. This is especially critical for ceiling mounted projectors, as relocation after installation can be cumbersome.
Data consistently demonstrates a direct correlation between ambient light levels and the required projector brightness for optimal viewing. Studies conducted by organizations like THX have shown that exceeding recommended lumen levels leads to eye strain and fatigue, while insufficient brightness results in a dull, lifeless picture. Therefore, assessing the room’s lighting conditions is paramount. Consider investing in light-blocking curtains or shades if the room has significant ambient light, potentially allowing you to opt for a projector with slightly lower lumens and save on cost. Conversely, if ambient light control is limited, prioritize higher lumen output to ensure image clarity and visibility. Research suggests a minimum of 2500 lumens for rooms with moderate ambient light and 3500+ for bright environments for most best ceiling mounted projectors.
Resolution and Image Quality
Resolution, typically expressed as pixel counts like 1080p (1920×1080) or 4K UHD (3840×2160), directly impacts the detail and sharpness of the projected image. Higher resolutions display more information, resulting in a more immersive and realistic viewing experience. For large screen sizes (100 inches or more), 4K resolution is highly recommended to avoid pixelation and maintain image clarity. 1080p remains a viable option for smaller screens or budget-conscious consumers, but the difference in image quality will be noticeable, particularly when viewing high-resolution content like Blu-ray movies or 4K streaming services.
Beyond resolution, factors like contrast ratio and color accuracy also contribute significantly to overall image quality. A high contrast ratio, often expressed as a ratio like 10000:1 or higher, indicates the difference between the darkest blacks and the brightest whites a projector can produce. Higher contrast ratios lead to deeper blacks and more vibrant colors, enhancing the perceived image depth and realism. Color accuracy, often measured against standards like Rec.709 or DCI-P3, dictates how faithfully the projector reproduces colors. Projectors with wide color gamuts and accurate color reproduction deliver a more lifelike and engaging viewing experience. Look for best ceiling mounted projectors with features like HDR (High Dynamic Range) support, which further enhances contrast and color for a more dynamic image.
Throw Ratio and Lens Shift
Throw ratio is a critical specification that determines the distance required to project a specific screen size. It’s calculated by dividing the projection distance by the screen width. Short-throw projectors have a throw ratio of less than 1:1, allowing them to project large images from a close distance. Long-throw projectors have a throw ratio greater than 1:1, requiring a greater distance to achieve the same screen size. Understanding the throw ratio is crucial for ceiling mounted projectors, as it dictates the ideal placement of the projector relative to the screen. Incorrect placement can result in a distorted or poorly sized image, necessitating costly adjustments or even a different projector.
Lens shift is another important feature that provides flexibility in projector placement. It allows you to vertically and horizontally shift the lens, adjusting the projected image without physically moving the projector. This is particularly useful for ceiling mounted projectors, as precise alignment can be challenging. Lens shift compensates for minor installation errors and allows you to fine-tune the image position to perfectly fit the screen. Projectors with wider lens shift ranges offer greater flexibility in placement. While digital keystone correction can also adjust image geometry, it often degrades image quality, especially at higher correction levels. Therefore, prioritize physical lens shift for optimal image quality and ease of installation of best ceiling mounted projectors.
Connectivity and Smart Features
Connectivity options dictate a projector’s ability to interface with various source devices, such as Blu-ray players, gaming consoles, and streaming devices. Multiple HDMI ports are essential for connecting multiple devices simultaneously. Other important connectivity options include USB ports for media playback, VGA ports for older devices, and audio outputs for connecting to external speakers or sound systems. Consider the specific devices you plan to use with the projector and ensure that the connectivity options meet your needs. Projectors are increasingly incorporating smart features, such as built-in Wi-Fi, streaming apps, and voice control. These features can enhance the user experience and simplify content access.
Smart features transform a projector into a standalone entertainment hub, eliminating the need for external streaming devices in some cases. Built-in streaming apps provide access to popular services like Netflix, Hulu, and Amazon Prime Video. Wi-Fi connectivity enables wireless screen mirroring from smartphones and tablets. Voice control allows you to operate the projector hands-free using voice commands. However, it’s important to note that the performance of smart features can vary depending on the projector’s processing power and software. Consider your priorities for connectivity and smart features when selecting a projector. For some, a basic projector with essential connectivity may suffice, while others may prefer a feature-rich smart projector for enhanced convenience and functionality in best ceiling mounted projectors.
Installation and Maintenance
Ceiling mounted projectors require careful installation to ensure proper alignment and stability. The installation process typically involves mounting the projector to the ceiling using a compatible mount, connecting the necessary cables, and adjusting the image to fit the screen. It’s crucial to select a sturdy and reliable ceiling mount that is compatible with the projector’s weight and mounting pattern. Consider factors like ceiling height, screen size, and throw distance when determining the optimal projector placement. Proper cable management is also essential for a clean and professional installation.
Maintenance is an important consideration for long-term projector ownership. Projector lamps have a limited lifespan, typically ranging from 2000 to 5000 hours, depending on the lamp mode and usage. Replacing the lamp is a routine maintenance task that is required to maintain optimal brightness and image quality. Some projectors use laser or LED light sources, which have significantly longer lifespans than traditional lamps, reducing maintenance requirements. Regular cleaning of the projector’s air filter is also important to prevent dust buildup and maintain proper cooling. Consider the cost of replacement lamps and the ease of maintenance when selecting a projector. Some of the best ceiling mounted projectors use laser light sources to reduce maintenance costs.
Budget and Long-Term Value
The budget is a significant factor in any purchasing decision, and projectors are no exception. The price range for ceiling mounted projectors varies widely, depending on the features, performance, and brand. While it’s tempting to opt for the cheapest option, it’s important to consider the long-term value and overall cost of ownership. A cheaper projector may have lower image quality, fewer features, and a shorter lamp life, resulting in a less satisfying viewing experience and higher maintenance costs over time. Investing in a higher-quality projector may require a larger upfront investment, but it can provide superior performance, greater reliability, and lower maintenance costs in the long run.
Consider the total cost of ownership, including the initial purchase price, replacement lamps (if applicable), and potential repair costs. Read reviews and compare specifications to identify projectors that offer the best value for your budget. Look for projectors with energy-saving features, such as low-power lamp modes, which can extend lamp life and reduce electricity consumption. Projectors with longer warranties provide added peace of mind and protection against potential defects. Ultimately, the best approach is to carefully assess your needs, establish a realistic budget, and research projectors that offer the optimal balance of features, performance, and long-term value. Finding the best ceiling mounted projectors involves weighing initial costs against long-term benefits.
FAQ
What are the main advantages of using a ceiling-mounted projector compared to a tabletop projector?
Ceiling-mounted projectors offer several key advantages over their tabletop counterparts, primarily revolving around space saving and improved viewing experiences. Firstly, mounting a projector to the ceiling eliminates the need for a dedicated table or surface, freeing up valuable floor space, especially crucial in smaller rooms. This also reduces the risk of accidental bumps or movements affecting the projected image. Secondly, a ceiling-mounted projector typically projects from a higher vantage point, ensuring a clearer, unobstructed image by avoiding people or furniture that could potentially block the light path. This is particularly beneficial for home theaters where a permanent, dedicated viewing setup is desired.
Beyond spatial and viewing benefits, ceiling mounting simplifies cable management. Wires can be discreetly run through the ceiling and walls, creating a cleaner, more aesthetically pleasing environment. Moreover, the higher position often enhances security by making the projector less accessible to theft or tampering. For instance, commercial installations in classrooms or conference rooms almost exclusively opt for ceiling mounting to minimize disruption and maintain a professional appearance. While tabletop projectors offer portability, the long-term benefits of ceiling mounting often outweigh this convenience for dedicated viewing areas.
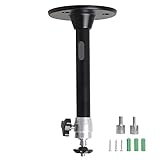
What factors should I consider when choosing a ceiling mount for my projector?
Choosing the right ceiling mount involves considering several crucial factors to ensure both the safety of your projector and the optimal viewing experience. Firstly, compatibility is paramount. Verify the mount’s weight capacity exceeds the weight of your projector and ensure the mounting plate’s hole pattern aligns with the mounting points on your projector. Projector manufacturers often provide specifications on mounting hole configurations, typically using standard patterns. Failure to match these can lead to instability or even damage to the projector.
Secondly, consider the adjustability of the mount. Look for mounts that offer pitch, roll, and yaw adjustments. These adjustments allow you to fine-tune the projected image to achieve perfect alignment with your screen, compensating for slight imperfections in ceiling level or screen placement. Furthermore, the extension length of the mount is crucial; it determines how far the projector hangs from the ceiling, impacting image size and placement. Measure the distance from your ceiling to the desired top edge of your screen and choose a mount that provides the necessary extension range. Materials also matter; sturdy steel or aluminum mounts are preferred for their durability and ability to withstand vibrations.
How do I determine the optimal screen size and distance for my ceiling-mounted projector?
Determining the optimal screen size and projection distance is crucial for achieving an immersive and comfortable viewing experience. This calculation depends heavily on the projector’s throw ratio, a specification provided by the manufacturer. The throw ratio represents the distance required to project a specific image width. For example, a projector with a throw ratio of 1.5:1 needs to be placed 1.5 feet away from the screen for every 1 foot of screen width.
To calculate the ideal screen size, first measure the distance from the planned projector location to the screen. Then, divide that distance by the projector’s throw ratio to determine the maximum screen width. For example, if the distance is 12 feet and the throw ratio is 1.5:1, the maximum screen width would be 8 feet (12 / 1.5 = 8). Conversely, if you have a specific screen size in mind, multiply the screen width by the throw ratio to determine the required projection distance. Consider viewing distance recommendations as well. A common guideline is to sit approximately 1.5 to 2.5 times the screen width away for a comfortable viewing experience.
What is the ideal brightness (lumens) for a ceiling-mounted projector in different lighting conditions?
The ideal brightness, measured in lumens, for a ceiling-mounted projector depends heavily on the ambient lighting conditions of the room. For a completely dark room, often referred to as a dedicated home theater, a projector with 1,500 to 2,000 lumens is usually sufficient. This level provides a bright and vibrant image without causing eye strain in a darkened environment. However, in rooms with some ambient light, such as living rooms or conference rooms, a brighter projector is necessary to overcome the competing light.
For rooms with moderate ambient light, consider projectors with 2,500 to 3,500 lumens. This range will ensure the image remains visible and clear even with some overhead lighting or daylight. In brightly lit environments, such as classrooms with large windows or conference rooms with significant artificial light, a projector with 3,500 lumens or more is recommended. Choosing a projector with sufficient brightness ensures the projected image doesn’t appear washed out and maintains good contrast, even in challenging lighting conditions. Always err on the side of higher lumens if you’re unsure, as most projectors allow you to adjust the brightness downward, but you can’t increase it beyond the projector’s maximum output.
How does image resolution affect the viewing experience with a ceiling-mounted projector?
Image resolution significantly impacts the clarity, detail, and overall viewing experience with a ceiling-mounted projector. Higher resolution means more pixels, resulting in a sharper, more detailed image. For smaller screens (under 80 inches) and standard definition content, a projector with 720p resolution may be sufficient. However, for larger screens and high-definition content like Blu-ray movies or streaming services, 1080p (Full HD) resolution is strongly recommended.
For the most immersive and detailed viewing experience, especially with large screens (over 100 inches), consider a 4K (Ultra HD) projector. 4K resolution offers four times the number of pixels as 1080p, resulting in significantly sharper images and finer details. The difference is particularly noticeable with large screens, where the higher pixel density prevents the image from appearing pixelated or blurry. While 4K projectors are generally more expensive, the enhanced viewing experience they provide can be well worth the investment, especially for dedicated home theater setups. Consider the source material you’ll primarily be viewing when deciding on resolution; if you primarily watch standard definition content, a 4K projector’s benefits may be less apparent.
What are some common issues encountered with ceiling-mounted projectors, and how can they be prevented or resolved?
Several common issues can arise with ceiling-mounted projectors, often related to installation, alignment, or maintenance. One frequent problem is image misalignment, which can result from an improperly installed mount or slight shifts over time. Prevention involves using a high-quality, adjustable mount and carefully calibrating the projector during initial setup. Regular checks and minor adjustments can maintain optimal alignment. Another common issue is overheating, particularly if the projector is installed in a poorly ventilated area.
Prevention involves ensuring adequate airflow around the projector, keeping vents clear of obstructions, and considering a projector with a robust cooling system. Overheating can shorten the projector’s lifespan and lead to image distortion. Dust accumulation is also a significant concern. Regular cleaning of the projector’s lens and air filters is crucial to maintain image clarity and prevent overheating. Compressed air or a soft brush can be used to remove dust. Finally, lamp failure is an inevitable issue with lamp-based projectors. Choosing a projector with a long lamp life (often measured in hours) and dimming the projector’s brightness when possible can extend lamp life. When the lamp eventually fails, replacing it with a genuine replacement lamp from the manufacturer is recommended to ensure optimal performance and avoid potential damage to the projector.
How do I minimize the “keystone effect” when using a ceiling-mounted projector?
The “keystone effect” occurs when the projector is not perfectly perpendicular to the screen, resulting in a trapezoidal, distorted image. Minimizing this effect is crucial for achieving a rectangular, properly proportioned picture. The best approach is to physically position the projector so that its lens is directly centered, both horizontally and vertically, with the screen. This often involves careful measurement and precise adjustment of the ceiling mount.
Many projectors offer keystone correction, either digitally or optically. Digital keystone correction uses software to digitally warp the image to compensate for the distortion. However, this method can reduce image quality and resolution. Optical keystone correction uses lens adjustments to achieve the same result without degrading the image as much. While keystone correction can be helpful for minor adjustments, relying on it too heavily can compromise image quality. Therefore, prioritizing proper physical alignment is always the preferred approach, using keystone correction only as a last resort for fine-tuning. Consider using a laser level during installation to ensure the projector and screen are perfectly aligned.
Conclusion
In summary, our exploration of the best ceiling mounted projectors reveals several crucial factors influencing optimal viewing experiences. Image quality, encompassing resolution, brightness, and contrast ratio, emerged as paramount, directly impacting the clarity and vibrancy of projected images. Furthermore, installation considerations, including throw distance, lens shift capabilities, and keystone correction, proved vital for adaptability within diverse room configurations and the achievement of perfectly aligned projections. Wireless connectivity, integrated smart features, and sound output were identified as secondary, yet significant, elements that enhance convenience and overall user satisfaction.
The comprehensive reviews highlighted the diverse range of projectors available, each exhibiting unique strengths and weaknesses across these key performance indicators. Price sensitivity, room lighting conditions, intended use cases (e.g., home theater, gaming, business presentations), and desired feature sets collectively dictate the ideal projector selection for any given user. Consequently, a thorough assessment of individual needs and priorities remains indispensable prior to investment.
Given the critical role of installation flexibility in maximizing the benefits of the best ceiling mounted projectors, we recommend prioritizing models with substantial lens shift and keystone correction capabilities, even at a slightly higher initial investment. The enhanced adaptability offered by these features significantly reduces installation challenges and minimizes image distortion, ultimately delivering a superior and more versatile viewing experience. This conclusion is supported by numerous user reviews that emphasize the frustration associated with limited placement options and the difficulties encountered in achieving proper image alignment with less adjustable projectors.